When investing in cryptocurrency, the most important step you can take is ensuring your digital assets are safe. Online wallets and exchanges may be convenient, but they expose your funds to cyberattacks. A Trezor hardware wallet stores your private keys offline, offering unmatched security. This beginner-friendly guide will walk you through the Trezor setup process step by step.
The Trezor hardware wallet is a small device designed to securely store your cryptocurrency private keys. By keeping your keys offline, Trezor ensures hackers and malware cannot access your funds. Even if your computer is compromised, your crypto remains safe.
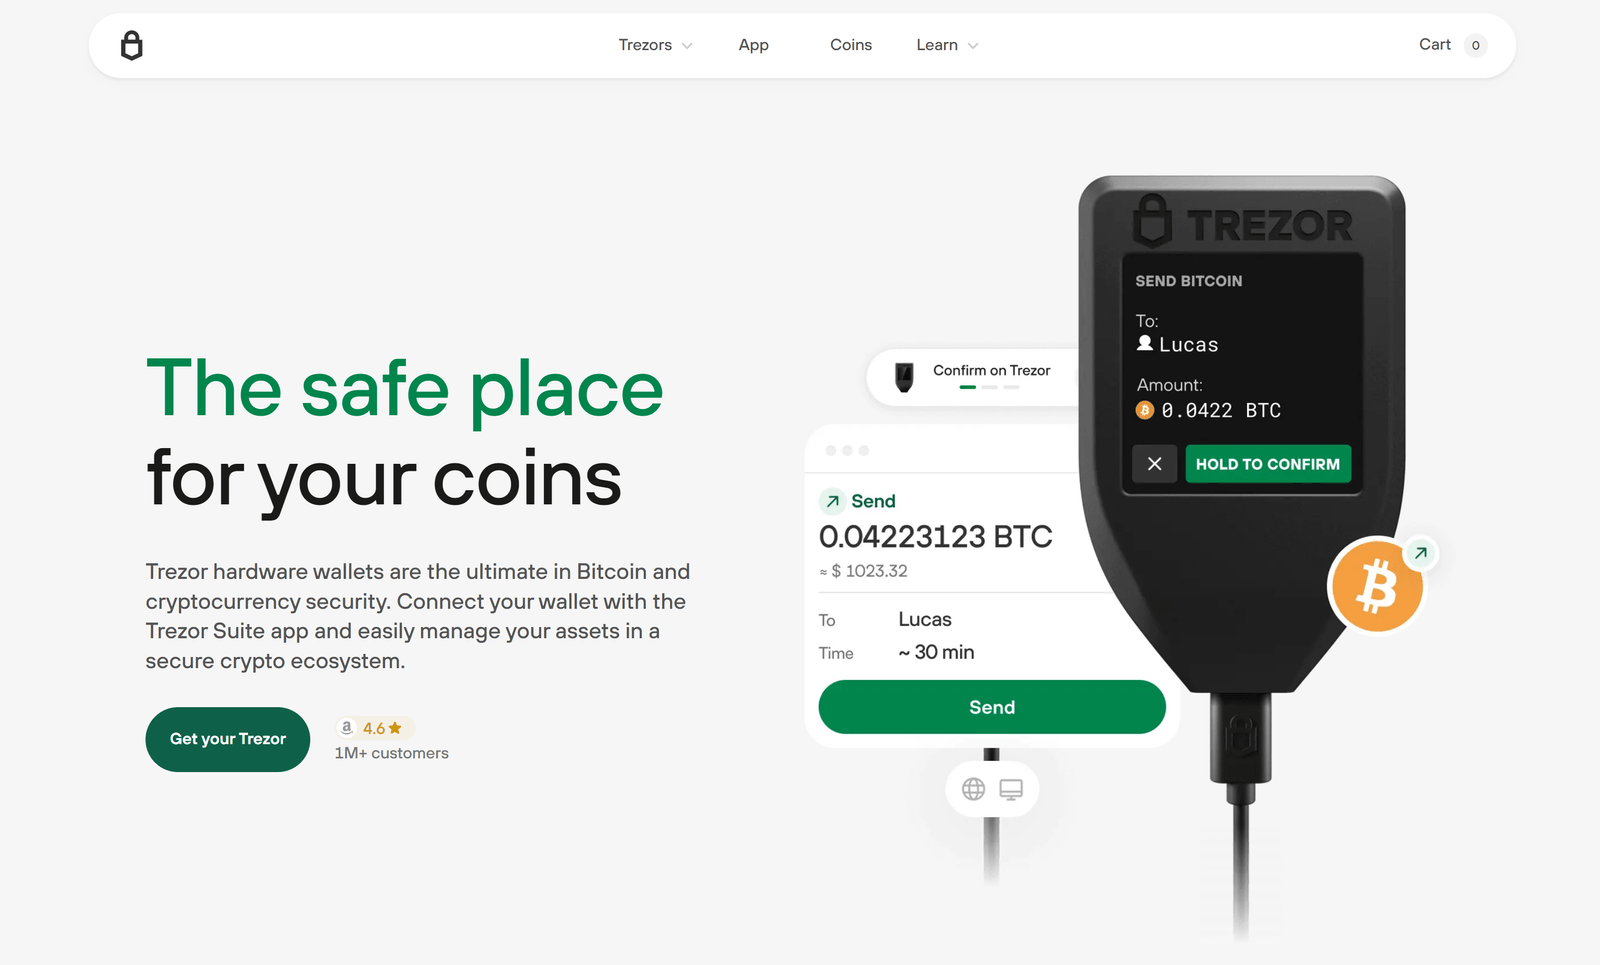
To send or receive cryptocurrency, simply connect your Trezor and confirm all details directly on the device screen. This ensures you are always in control and prevents unauthorized transactions.
By completing the Trezor hardware wallet setup, you take control of your cryptocurrency security. Whether you’re a beginner or an experienced investor, Trezor provides an easy-to-use yet powerful way to safeguard your digital wealth.
A Trezor hardware wallet is a physical device that stores your crypto keys offline, protecting them from hackers.
Connect it via USB, install Trezor Bridge, create a wallet, back up your recovery seed, set a PIN, and update the firmware.
A recovery seed is a backup phrase of 12–24 words used to restore access to your funds if your device is lost or damaged.
Yes, Trezor supports hundreds of digital assets in one secure device.
All transactions must be confirmed directly on your Trezor device, ensuring security and preventing unauthorized actions.